If you’re like most people, your camera is one of your most prized possessions. So when something goes wrong with it, it can be a real pain. But don’t worry, there are plenty of places where you can take your camera to get fixed. In this blog post, we’ll show you some of the best places to go to get your camera lens repaired.
Add a section on troubleshooting common camera lens problems.


2PCS ASDAWN Back Rear Camera Lens Glass Replacement for iPhone 14 Pro Max and 14 Pro Camera Glass Lens Replacement with Pre-Installed Adhesive + Repair Tool Kit + Installation Manual
- 【2 Pack OEM Camera Lens Glass 100% Fit】You can get 2 pack for the price of 1 pack! There is a spare camera glass in case of an accident.100% perfect fit original back rear camera glass replacement for iPhone 14 Pro All Carriers and 14 Pro Max All Carriers.Not for iPhone 14 and iPhone 14 Plus.Precisely the same as your iPhone 14 Pro OEM camera glass.Comes with original double-sided adhesive insure that the new lens glass will not fall off.Don’t worry about glue overflow and affect the appearance!
- 【Included Step By Step Installation Manual】Our iphone 14 Pro Max camera lens replacement repair set come with a detailed step by step installation manual to help you complete the repair process faster, reduce your time-consuming and increase the possibility of successful lens replacement. We also have 24 hours online after-sales staff to help you at any time. Instead of letting you go to YouTube to search and watch the video, because we insist on doing more for our customers!
- 【Protect Phone By Replacing The Lens Glass】If the lens is broken you will not have access to the full capacity of your camera. The broken iPhone 14 Pro glasses will make all your pictures blurry and you won’t be able to use your camera. Having the iphone 14 Pro lenses broken is that they can stop your camera stability and also in the long run you will have dust and particle of glasses on the sensor of those cameras. The broken lenses may also scratch you!
- 【Your Patience Has Saved You 50+ Dollars】Included a professional repair toolkit which make your repair much more easier, no need to open your phone. If it is replaced at a local mobile phone repair shop, it will cost at least $50+. But if you buy the iPhone 14 Pro Max rear camera replacement kit and repair it yourself, your patience has saved you 50 dollars, it is really cost-effective!!! And you can also experience the fun of DIY. After calculating this account, why not replace it yourself?
- 【100% Satisfaction And Product Guaranteed】We provide one year warranty for this iPhone 14 Pro Max camera lens glass replacement kit. We can send a new glass camera lens or other ways of handling as per your decision if you are not 100% satisfied with this product. Our brand’s customer service team is online 24 hours a day, you are welcome to contact us directly by email at any time if there are any questions. Thank you in advance for your support of our brand!

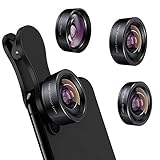
Removal Tool For iPhone Camera Lens Protector & iPad Metal Ring Lens Glass Easy Peel Off Remover – 2 Pack/White
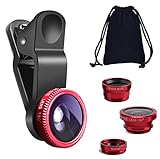
- 1.Helpful Phone Accessory – Cell Phone Camera Lens Remover Kit – 2 Pack Available in White
- 2.High quality ABS Material Made, Smooth and Durable.
- 3.Much better than the Equipped Camera Lens Protector Installation Tray.
- 4.Make it easy to apply remove the camera lens protector and keep your device clean.

QWORK DSLR Camera Repair Tool Kit – 3/8″ to 3-15/16″ Lens Repair Set, Anti-Magnetic 3 Tips, 6 Screws & 2 Hexagon Wrenches for Canon, Nikon, Sony, Olympus Cameras
- Durable material: Made of strong anti-magnetic stainless steel, durable,anti-corrosion.
- Adjustable jaw opening: 3/8″ to 3-15/16″ for opening the clamp ring of any optical lens, meet the needs of most lens sizes.
- 3 types of tips: Flat, semi-flat, and pointed with 6 screw locking design.
- Locking design: 6 screw locking design makes the crossbar more flexible for adjustment.
- Widely Used: The extended head is suitable for some lens graphic cameras, can be used in the camera body grip ring elsewhere.
If you’re having trouble with your camera lens, there are a few things you can do to troubleshoot the issue. First, check to make sure that the lens is clean.
If there are any smudges or fingerprints on the lens, clean it with a lens cloth. If the lens is still dirty, you can try using a can of compressed air to blow any dust or debris off of the lens.
If your lens is clean and you’re still having trouble, the next step is to check the camera’s autofocus system. If the autofocus system is turned off, the camera won’t be able to take clear pictures. To turn on the autofocus system, consult your camera’s manual.
If the autofocus system is turned on and you’re still having trouble, the next step is to check the camera’s aperture. The aperture is the opening in the lens that allows light to pass through. If the aperture is too small, the camera won’t be able to take clear pictures. To adjust the aperture, consult your camera’s manual.
If you’re still having trouble after checking the aperture, the next step is to check the shutter speed. The shutter speed is the amount of time that the camera’s shutter is open when taking a picture. If the shutter speed is too slow, the camera won’t be able to take clear pictures. To adjust the shutter speed, consult your camera’s manual.
If you’re still having trouble after checking the shutter speed, the next step is to check the ISO setting. The ISO setting is the camera’s sensitivity to light. If the ISO setting is too high, the camera won’t be able to take clear pictures. To adjust the ISO setting, consult your camera’s manual.
If you’re still having trouble after checking the ISO setting, the next step is to check the white balance. The white balance is the setting that determines how the camera interprets colors. If the white balance is off, the colors in your pictures will be inaccurate. To adjust the white balance, consult your camera’s manual.
If you’re still having trouble after checking the white balance, the next step is to check the Exposure Compensation. The Exposure Compensation is a setting that allows you to adjust the amount of light that the camera is exposed to. If the Exposure Compensation is set too high, the pictures will be overexposed and too bright. If the Exposure Compensation is set too low, the pictures will be underexposed and too dark. To adjust the Exposure Compensation, consult your camera’s manual.
If you’re still having trouble after checking the Exposure Compensation, the next step is to check the metering mode. The metering mode is the setting that determines how the camera measures the amount of light in a scene. If the metering mode is set to “spot metering,” the camera will only take into account the light that is in the center of the frame. If the metering mode is set to “matrix metering,” the camera will take into account the light that is in the entire frame. To adjust the metering mode, consult your camera’s manual.
If you’re still having trouble after checking the metering mode, the next step is to check the flash. The flash is a built-in light that helps the camera take pictures in low-light situations. If the flash is turned off, the pictures will be too dark. To turn on the flash, consult your camera’s manual.
If you’re still having trouble after checking the flash, the next step is to check the focus. The focus is the setting that determines how sharp the pictures will be. If the focus is set to “automatic,” the camera will choose the best focus for the scene. If the focus is set to “manual,” you will need to focus the camera yourself. To focus the camera, consult your camera’s manual.
If you’re still having trouble after checking the focus, the next step is to check the image stabilization. The image stabilization is a setting that helps the camera take clear pictures. If the image stabilization is turned off, the pictures will be blurry. To turn on the image stabilization, consult your camera’s manual.
If you’re still having trouble after checking the image stabilization, the next step is to check the lens. The lens is the part of the camera that actually takes the picture. If the lens is dirty, the pictures will be blurry. If the lens is cracked, the pictures will be distorted. If the lens is loose, the pictures will be blurry. To fix a dirty lens, clean it with a lens cloth. To fix a cracked lens, replace it with a new lens. To fix a loose lens, tighten it with a lens wrench.
If you’re still having trouble after checking the lens, the next step is to check the
Expand the section on how to fix a camera lens to include more detailed instructions.
If your camera lens is broken, there are a few things you can do to try to fix it. First, try gently cleaning the lens with a soft cloth.
If that doesn’t work, you can try using a can of compressed air to blow any dust or debris out of the lens. If that still doesn’t work, you may need to take the camera to a professional to have the lens repaired or replaced.
Add a section on common causes of camera lens problems.
One of the most common causes of camera lens problems is dust. Dust can enter the lens when you change lenses, and it can also enter the camera body when you’re using a zoom lens.
Dust can also be generated by the camera itself, and it can be attracted by static electricity.
Another common cause of camera lens problems is moisture.
Moisture can enter the lens when you’re using the camera in humid or wet conditions, and it can also condense on the lens if the camera body is cold and the lens is warm.
If your camera lens is foggy, blurry, or has spots, it’s probably because of one of these two problems. Dust and moisture can both be removed from the lens with a lens cloth or a blower brush. If the problem persists, you may need to have the lens cleaned professionally.
Include a section on choosing the right camera lens for your needs.
There is no one-size-fits-all answer when it comes to choosing the right camera lens for your needs. The type of lens you’ll need depends on the type of photography you’re interested in pursuing.
For example, if you’re interested in landscape photography, you’ll need a different lens than if you’re interested in portrait photography.
That being said, there are a few general tips that can help you choose the right camera lens for your needs.
First, consider the focal length of the lens. The focal length is the distance between the camera lens and the sensor. A longer focal length will allow you to zoom in on your subject, while a shorter focal length will allow you to capture a wider field of view.
Second, consider the aperture of the lens. The aperture is the opening in the lens that allows light to pass through. A wider aperture will allow more light to pass through, which is great for low-light situations. A narrower aperture will allow you to capture more of your subject in focus.
Finally, consider the size of the lens. Larger lenses will allow you to capture more light, but they can be more difficult to carry around. Smaller lenses are more compact and easier to transport, but they might not perform as well in low-light situations.
Choosing the right camera lens is a personal decision that depends on your individual needs. However, by keeping these general tips in mind, you can be sure to choose a lens that will help you capture the photos you’ve always wanted to take.
Add a section on cleaning and caring for your camera lens.
When it comes to keeping your camera lens clean, there are a few things you can do to prolong its lifespan and keep it working properly. First, avoid touching the lens with your fingers as much as possible.
If you do need to clean it, use a lens cloth or a soft, clean brush. If you’re using a brush, be sure to brush in a circular motion from the center of the lens out.
You should also avoid exposing your lens to excessive dust, dirt, and moisture. If you’re going to be in a dusty or dirty environment, consider using a lens cover or keeping your camera in a bag. And if you’re going to be in a wet environment, consider using a waterproof camera cover.
Finally, be sure to clean your lens regularly. A good rule of thumb is to clean it after every use. This will help to remove any dirt, dust, or fingerprints that may have gotten on the lens during use.
Conclusion
It is important to be familiar with troubleshooting common camera lens problems, as well as knowing how to fix them. Additionally, it is helpful to know the common causes of camera lens problems so that you can avoid them. Finally, it is also important to know how to choose the right camera lens for your needs, as well as how to properly clean and care for your camera lens.